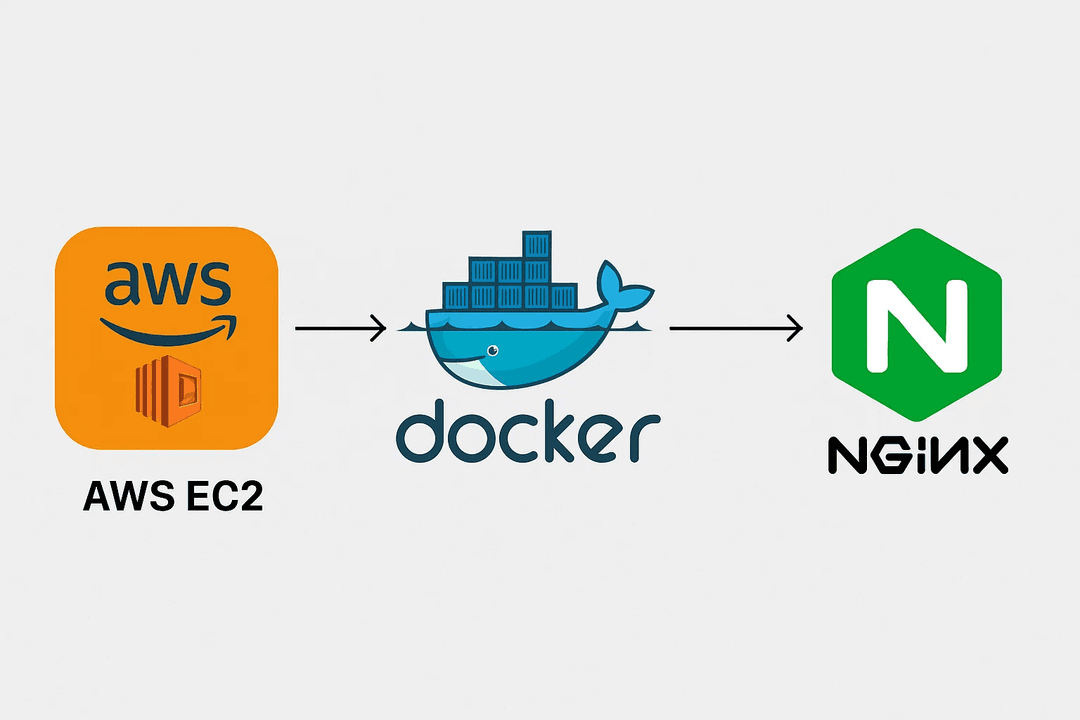
Running Nginx ("Engine X") in AWS EC2 Using Docker
Steps to run NGINX in AWS EC2 with Docker and login
1. Create a Free AWS Account
Create a free AWS Account at https://aws.amazon.com/
2. Create and Launch an EC2 Instance and SSH into the Machine
We’ll use a t3.micro Amazon Linux Machine for this demo.
You can choose any OS (Ubuntu, Debian, Amazon Linux, etc.); commands are mostly the same with minor syntax differences.
Step-by-step
-
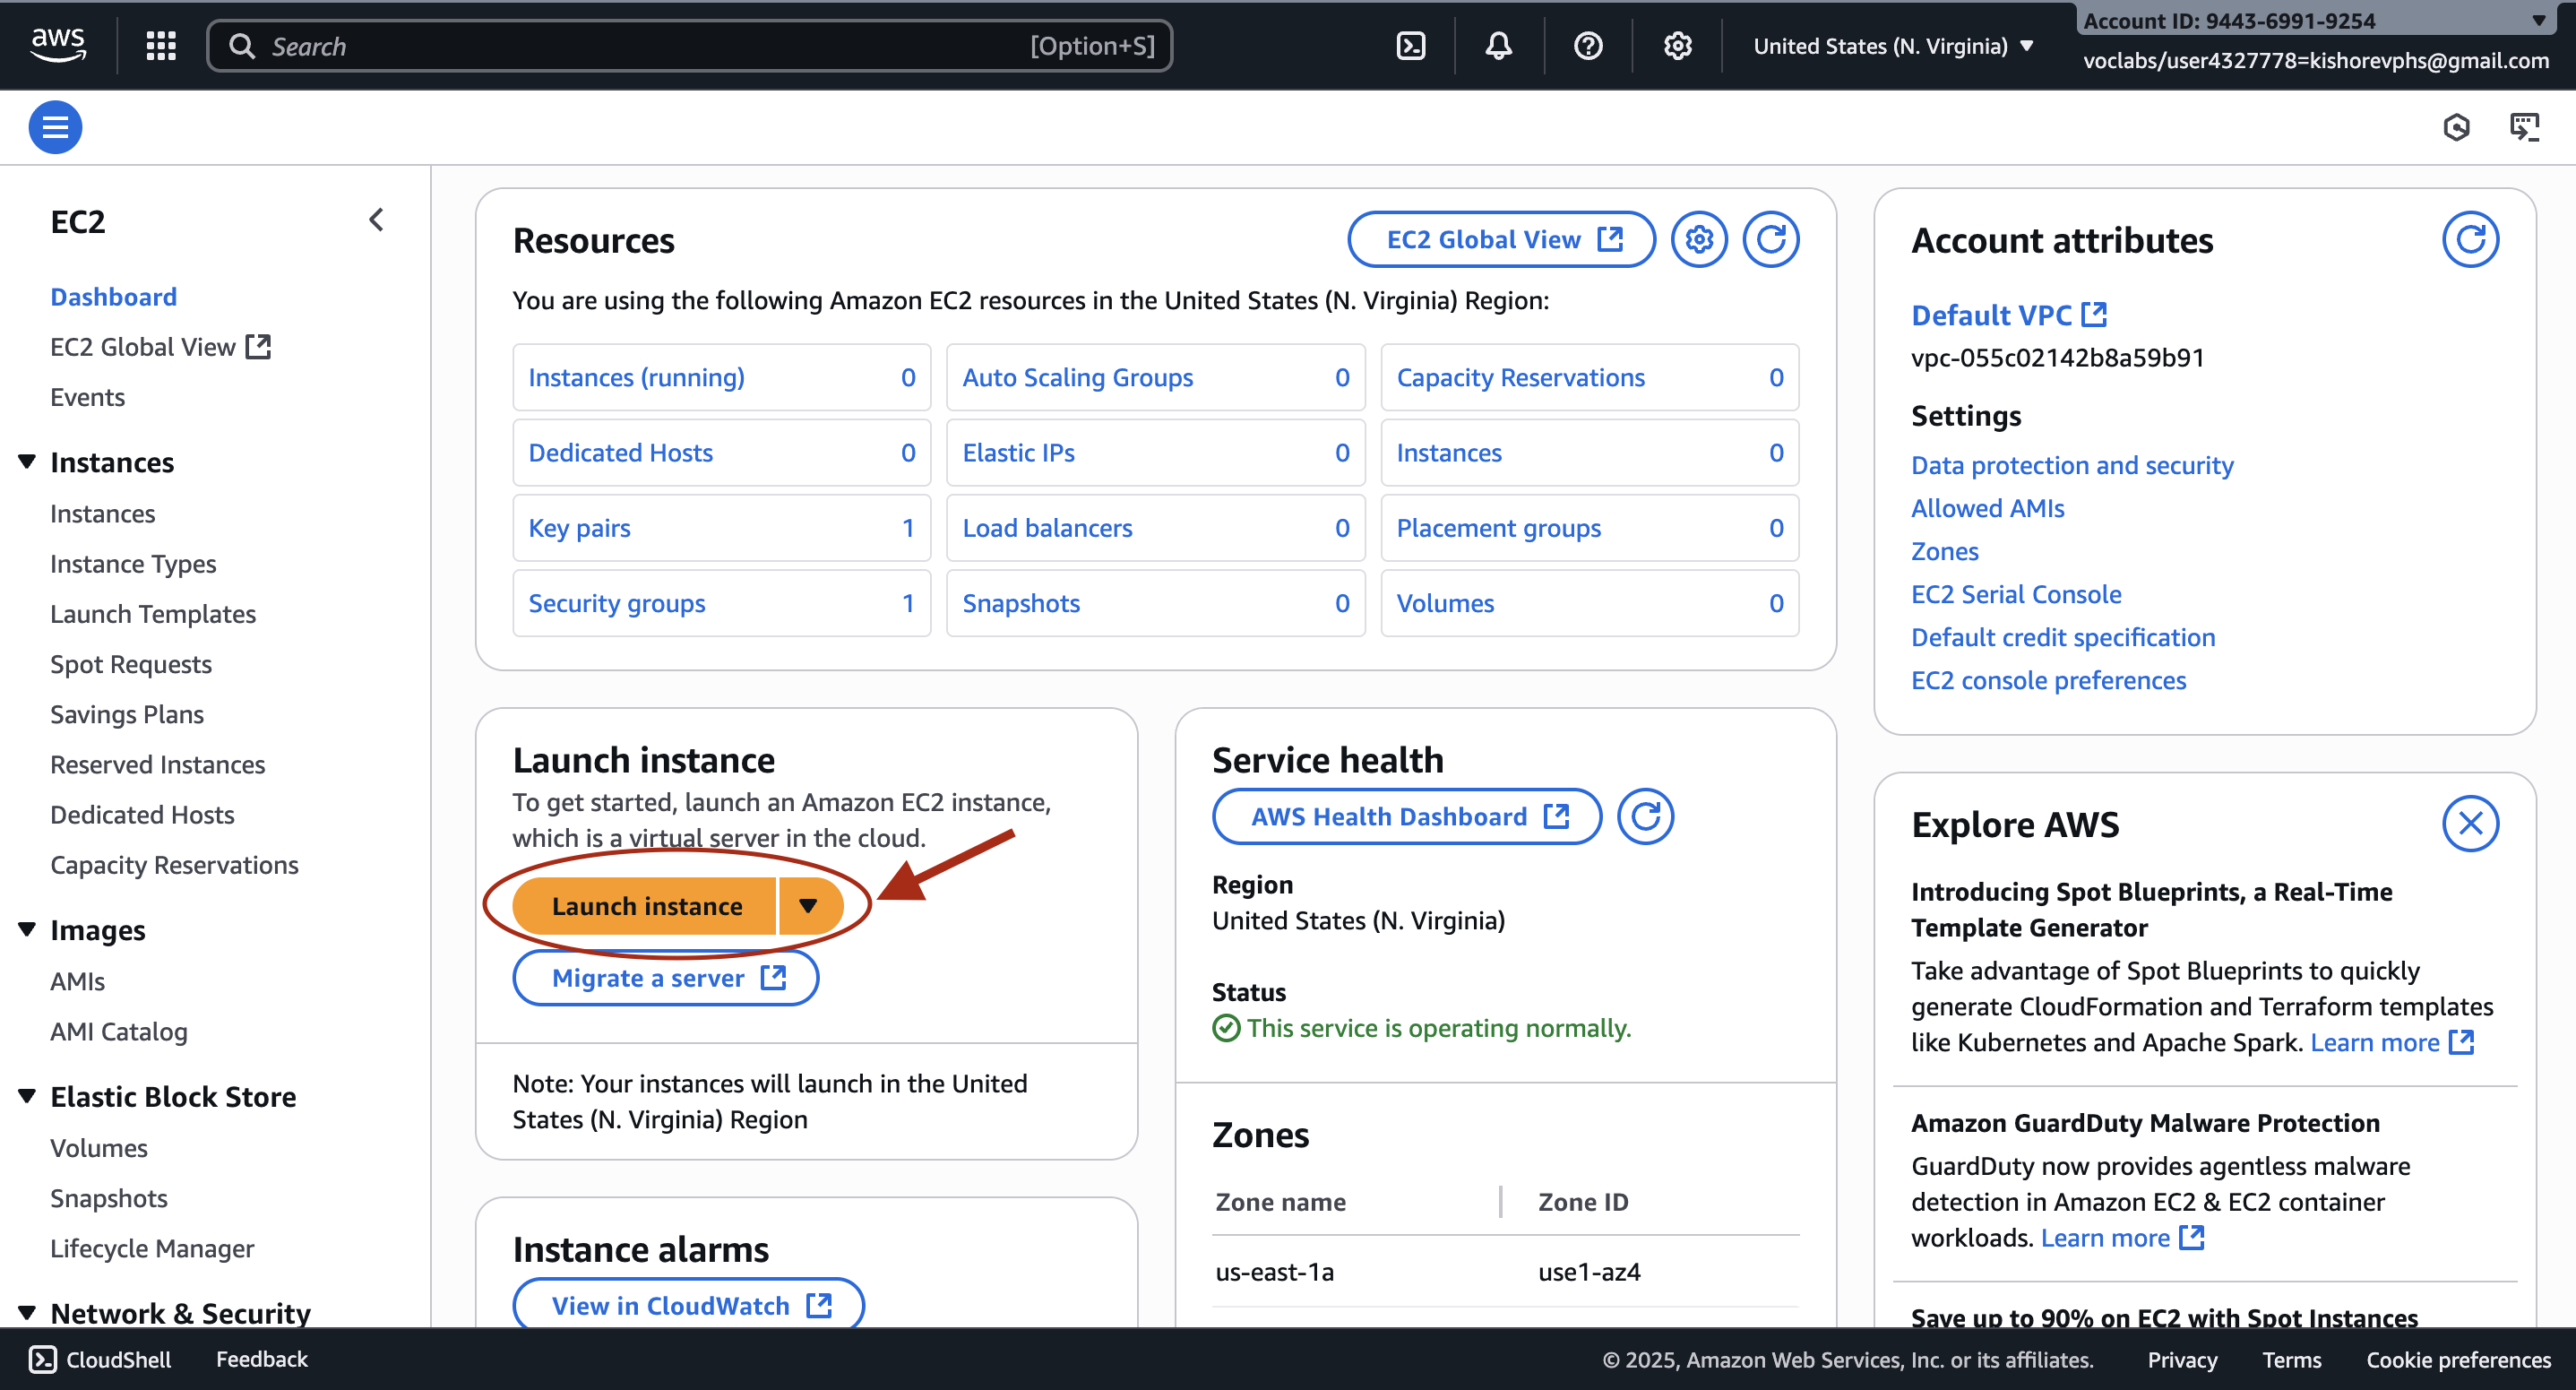
Search for EC2 in AWS Console
- Click on it — you’ll be redirected to the EC2 page.
- Click on Launch Instance
-
Give a Name to Your EC2 Machine
You can use any name you like.
Select your OS — here, Amazon Linux.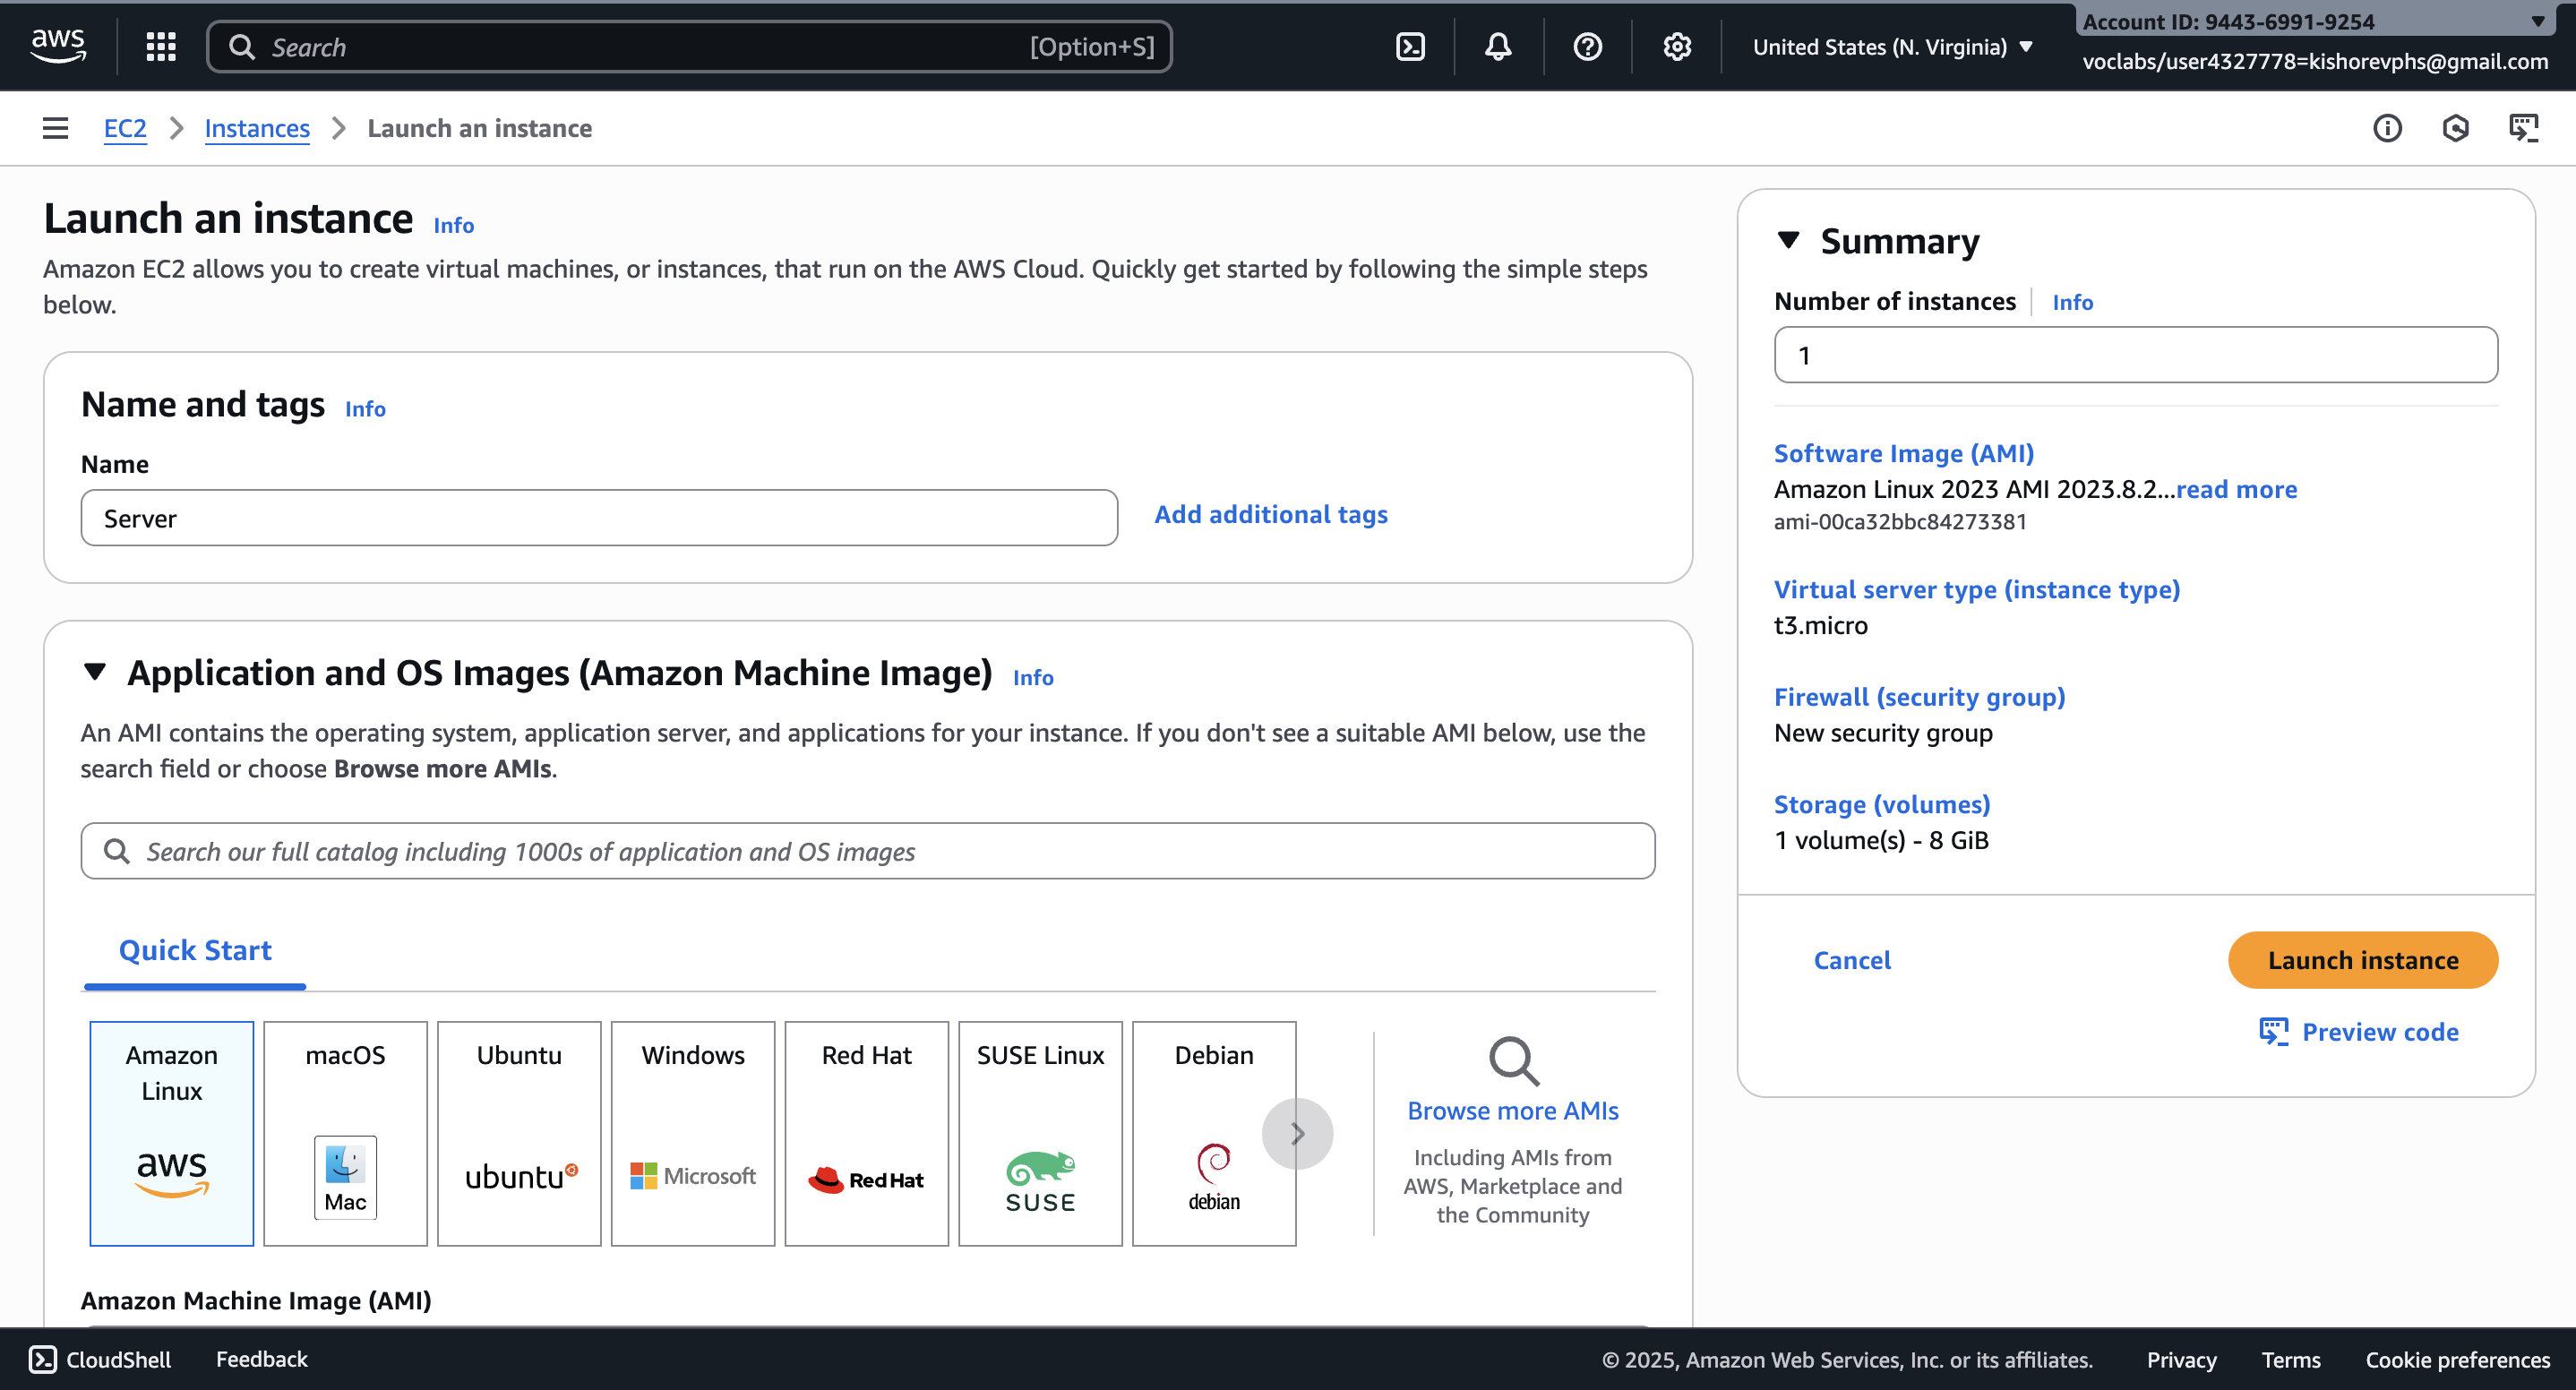
-
Instance Type and Key Pair
- Choose an instance type (e.g.,
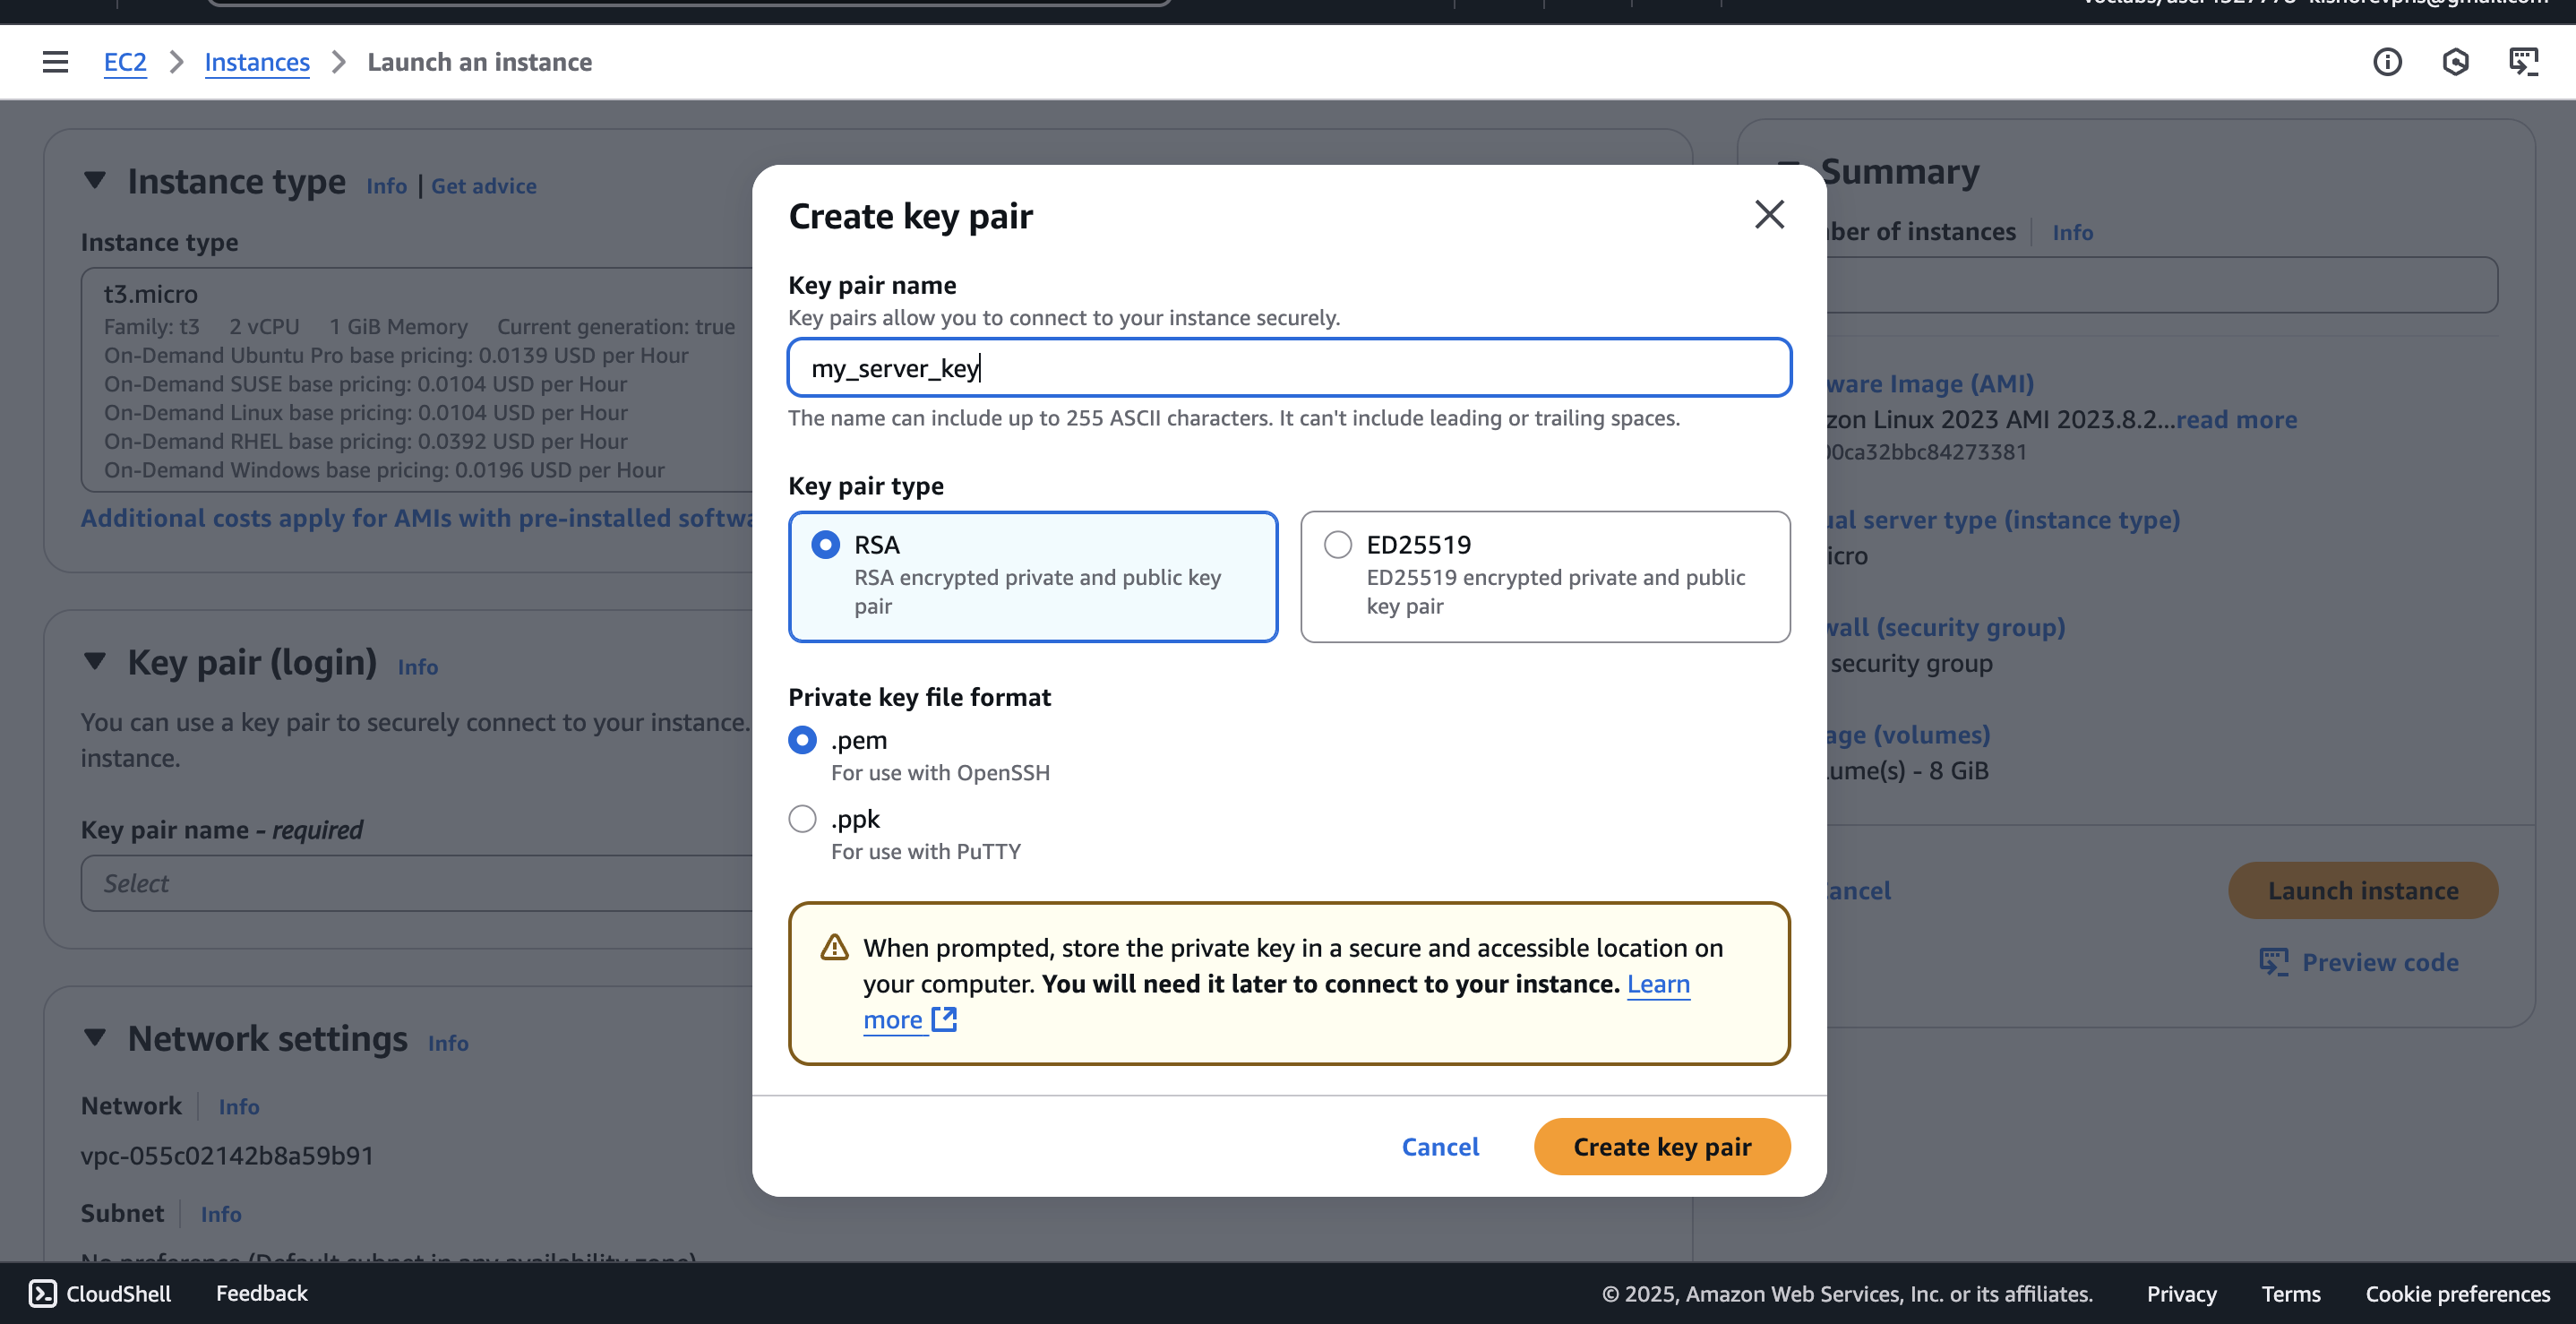
t2.mediumfor 2–3 medium websites). - Create a Key Pair to enable SSH access.
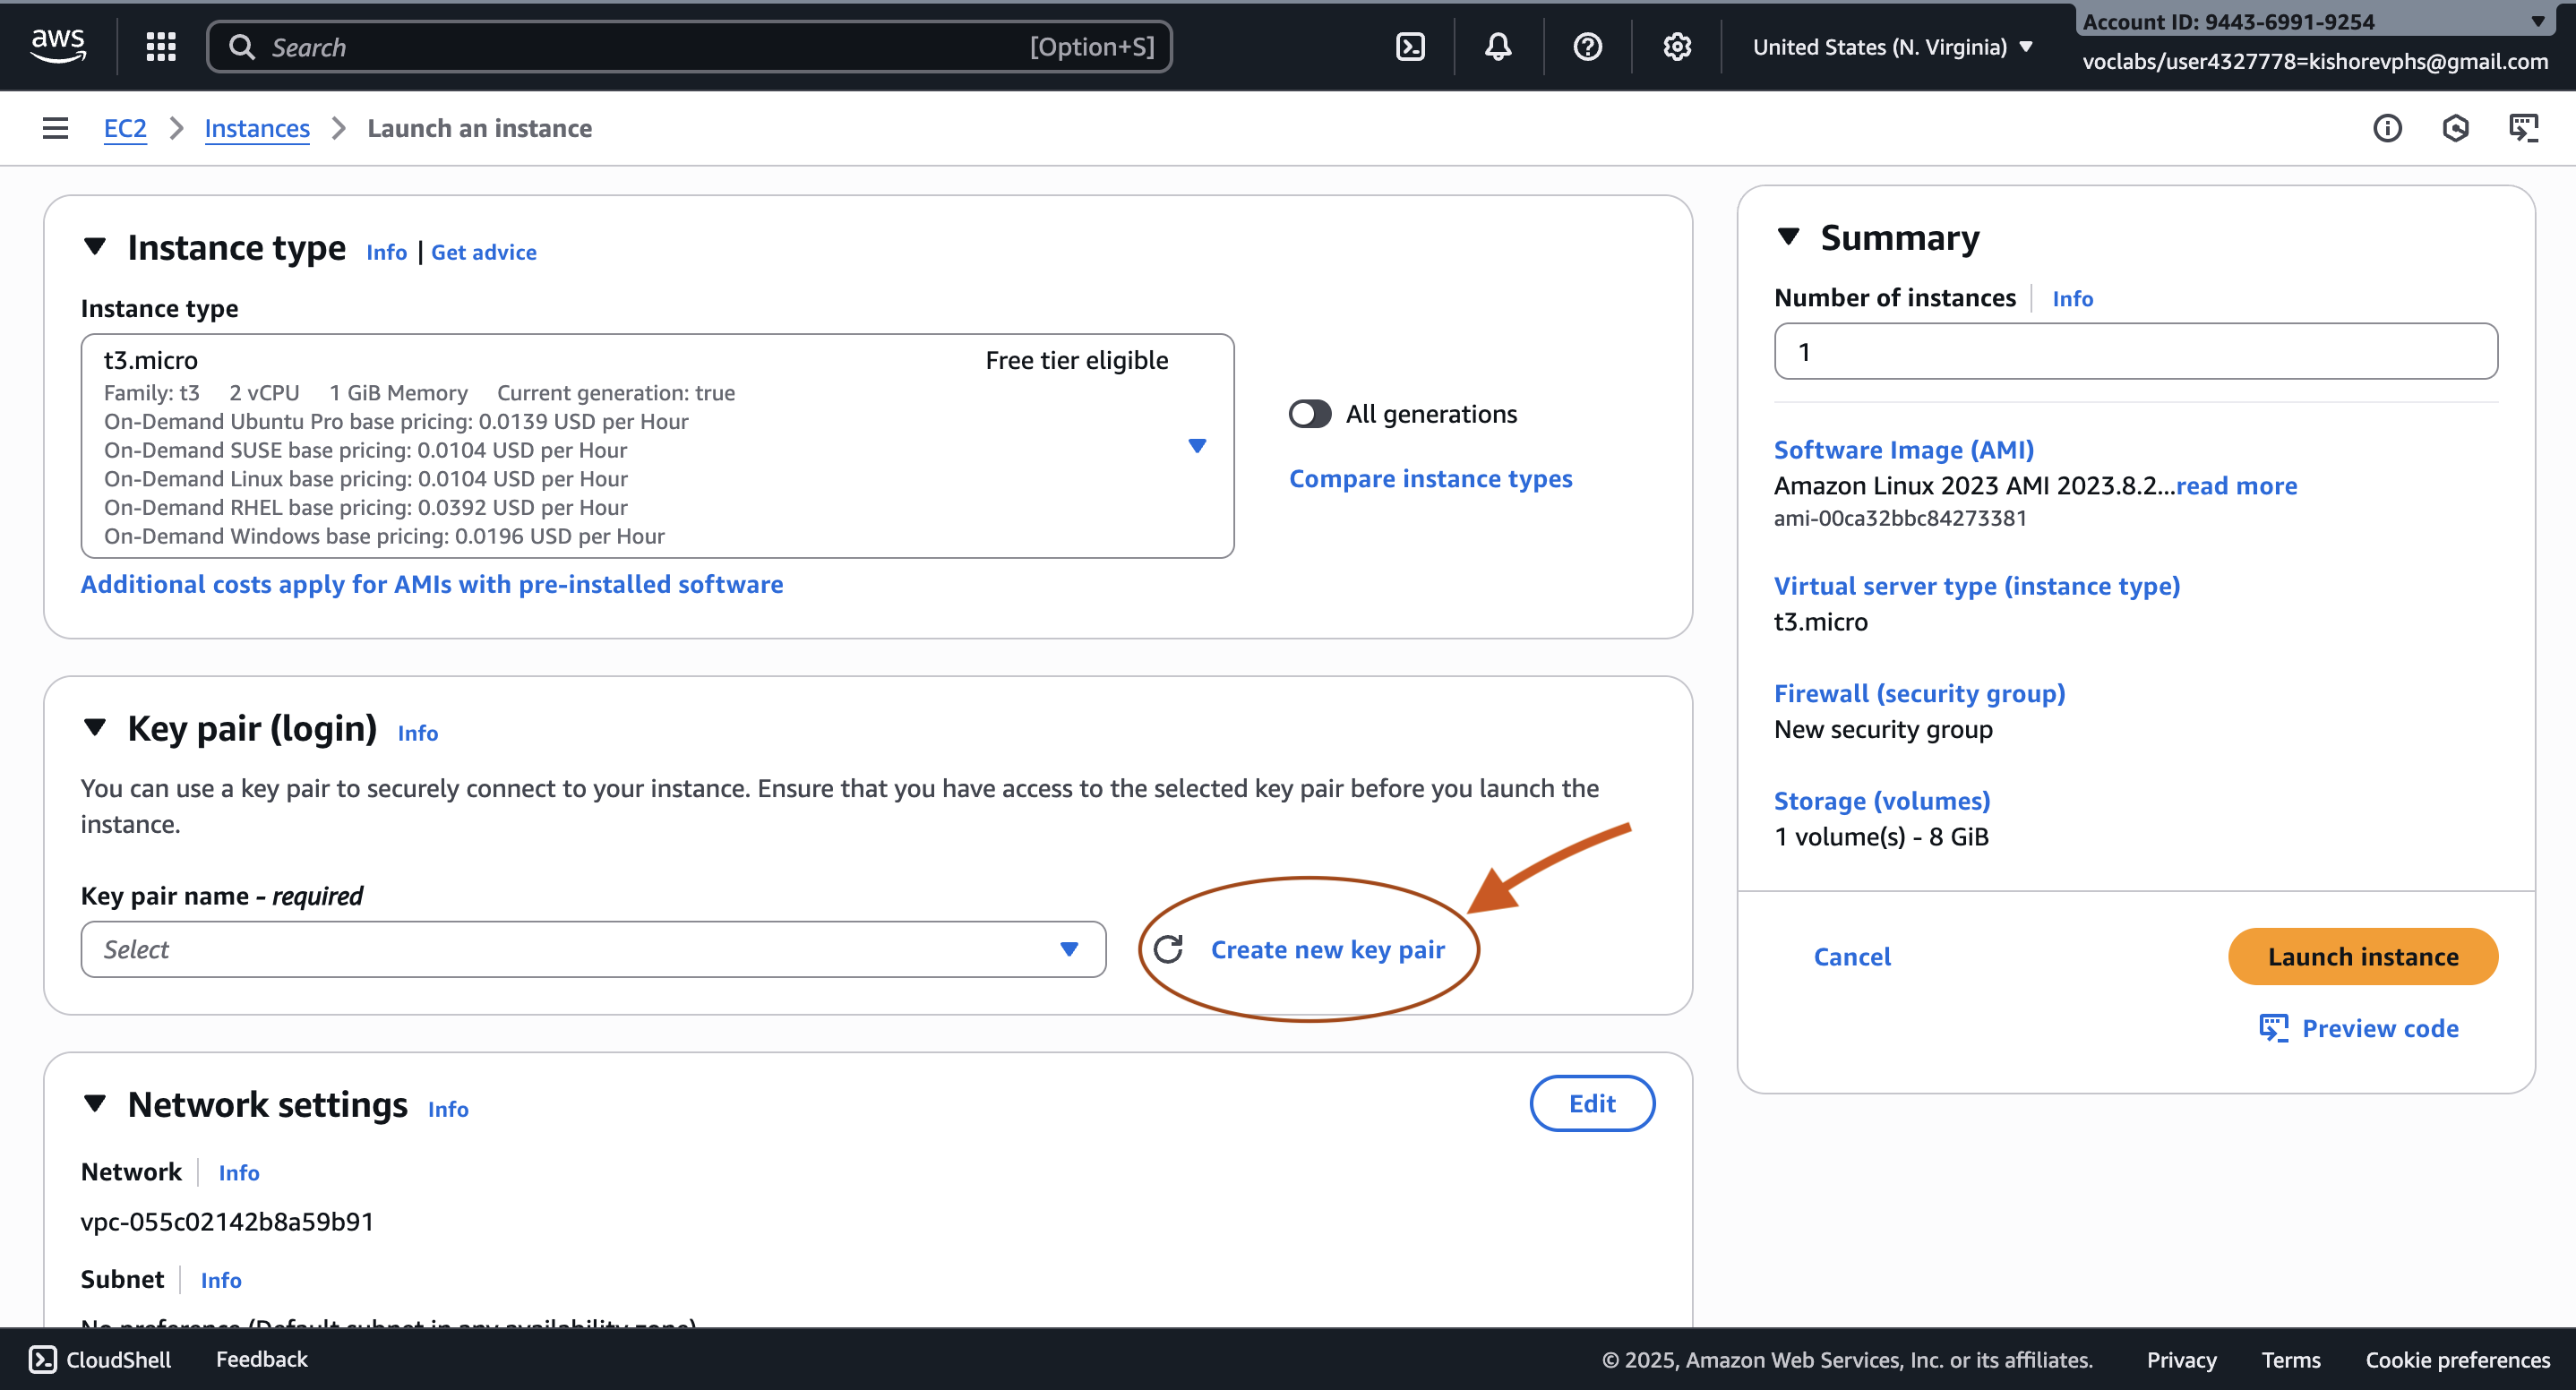
Give it a name and click Create Key Pair.
- Choose an instance type (e.g.,
-
Network Settings
Enable both:
- Allow HTTPS traffic from the internet
- Allow HTTP traffic from the internet
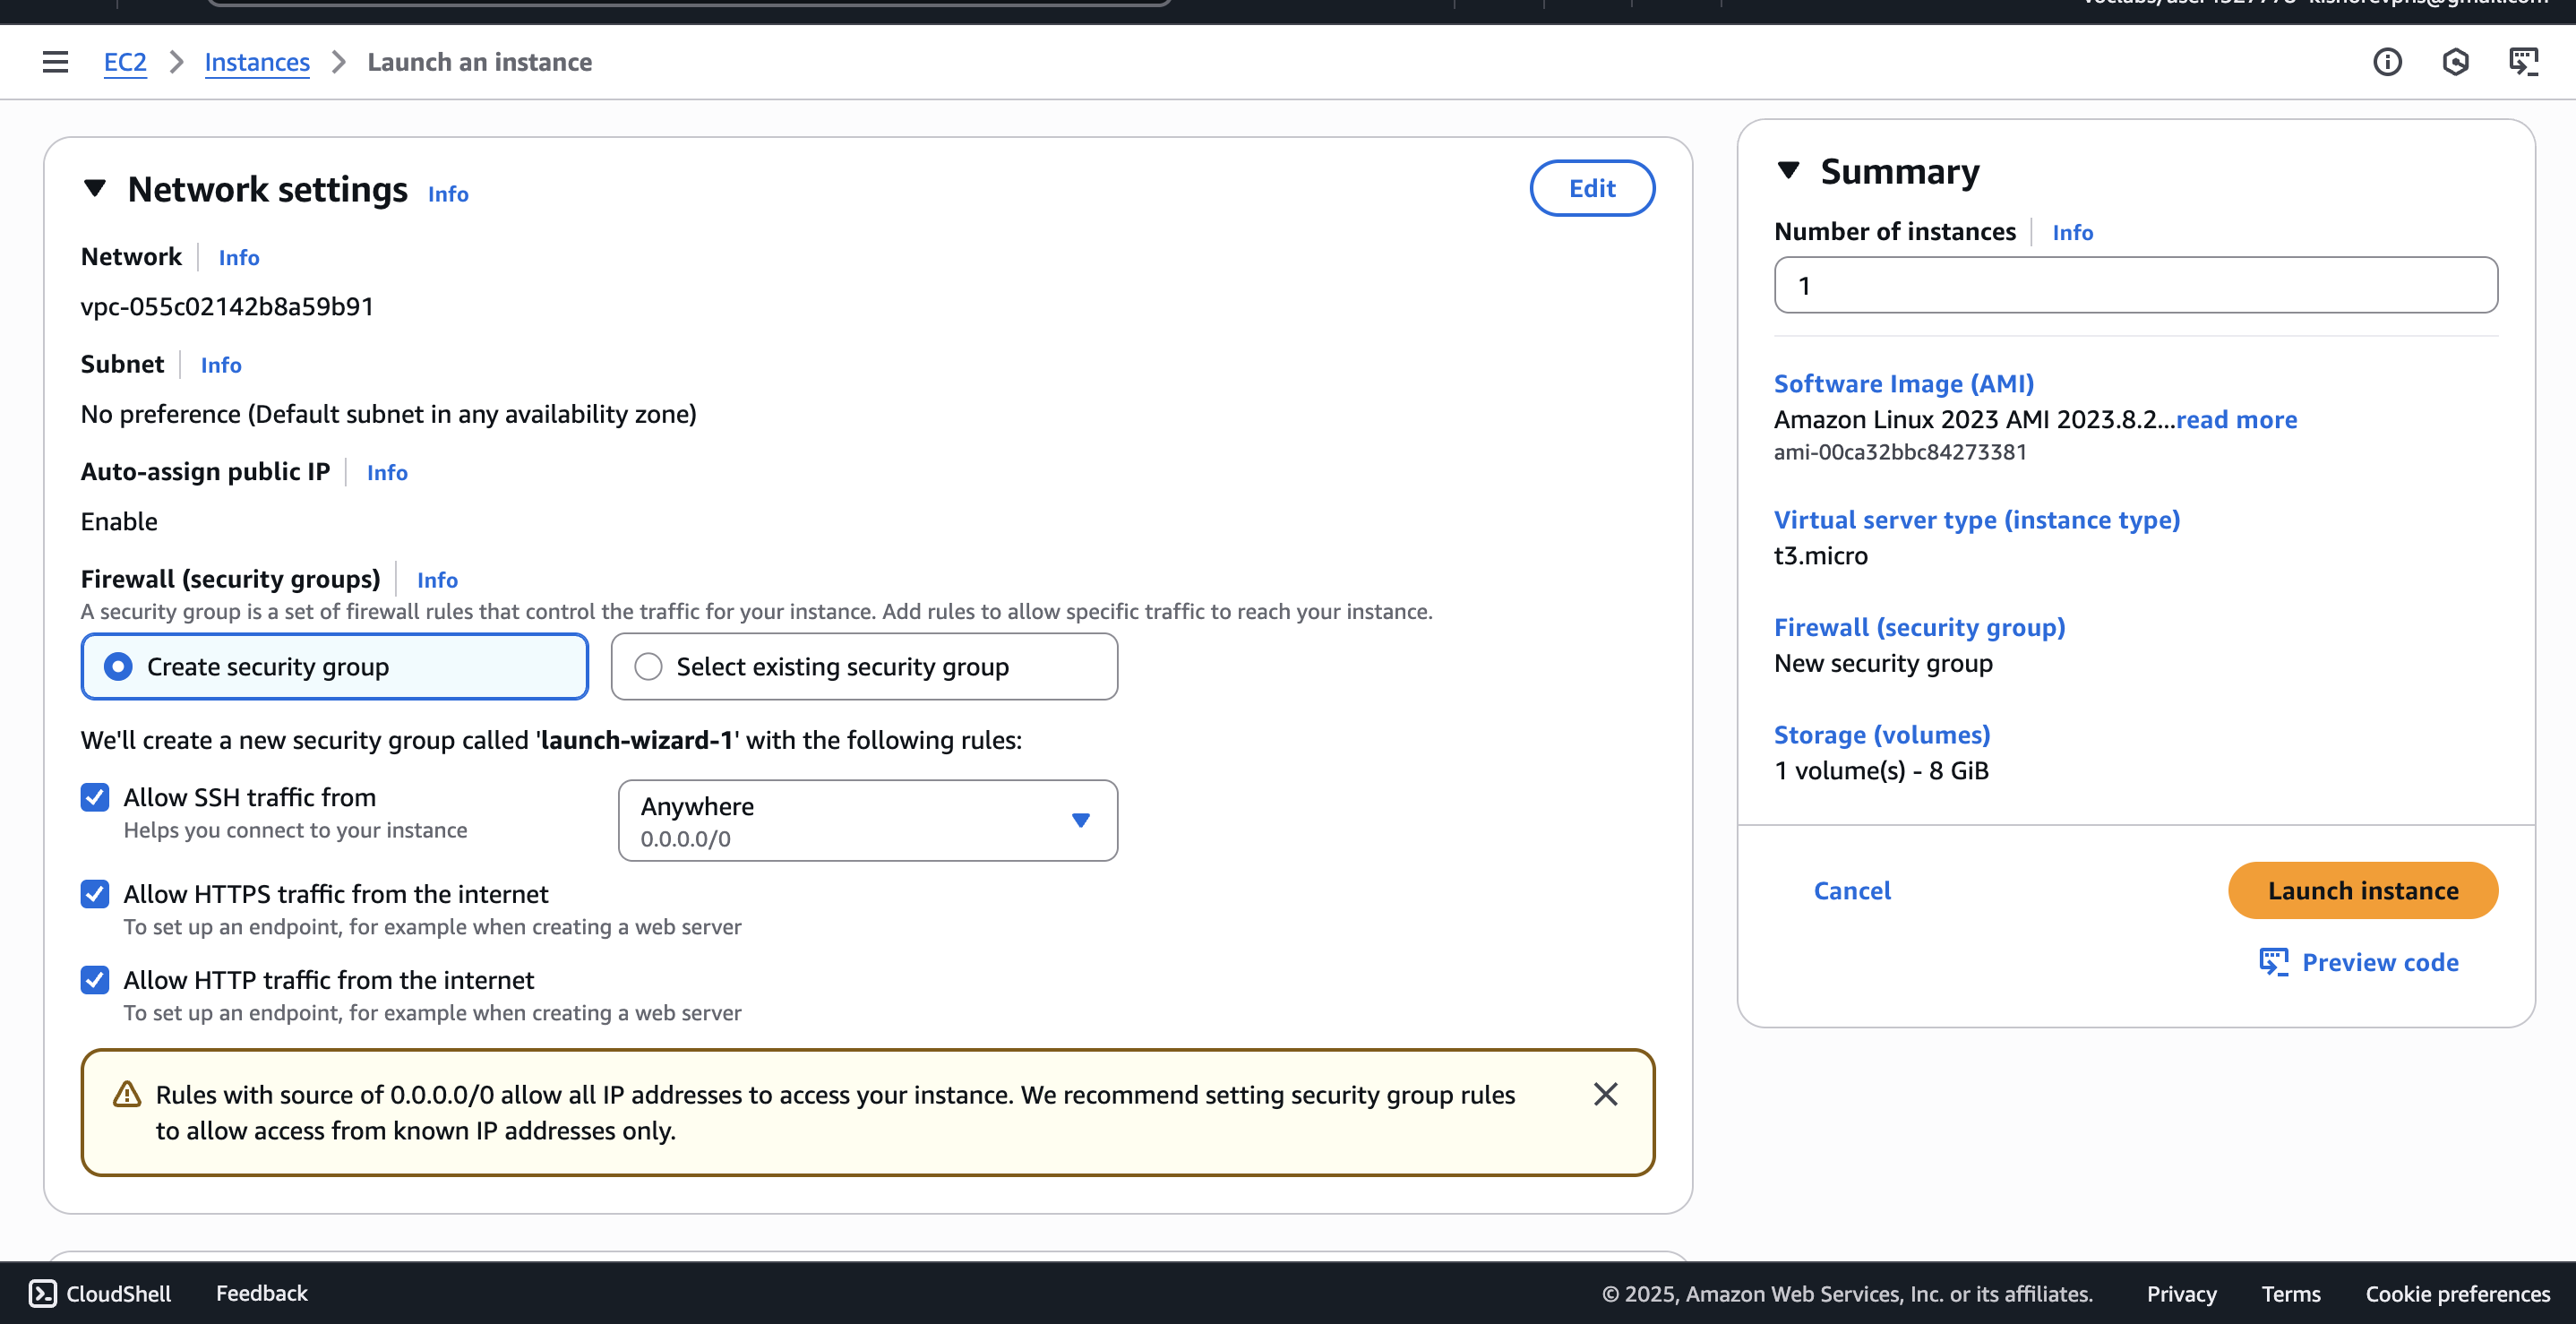
Then click Launch Instance.
-
Instance Launched Successfully
Click on your Instance ID — this opens the instance summary page.
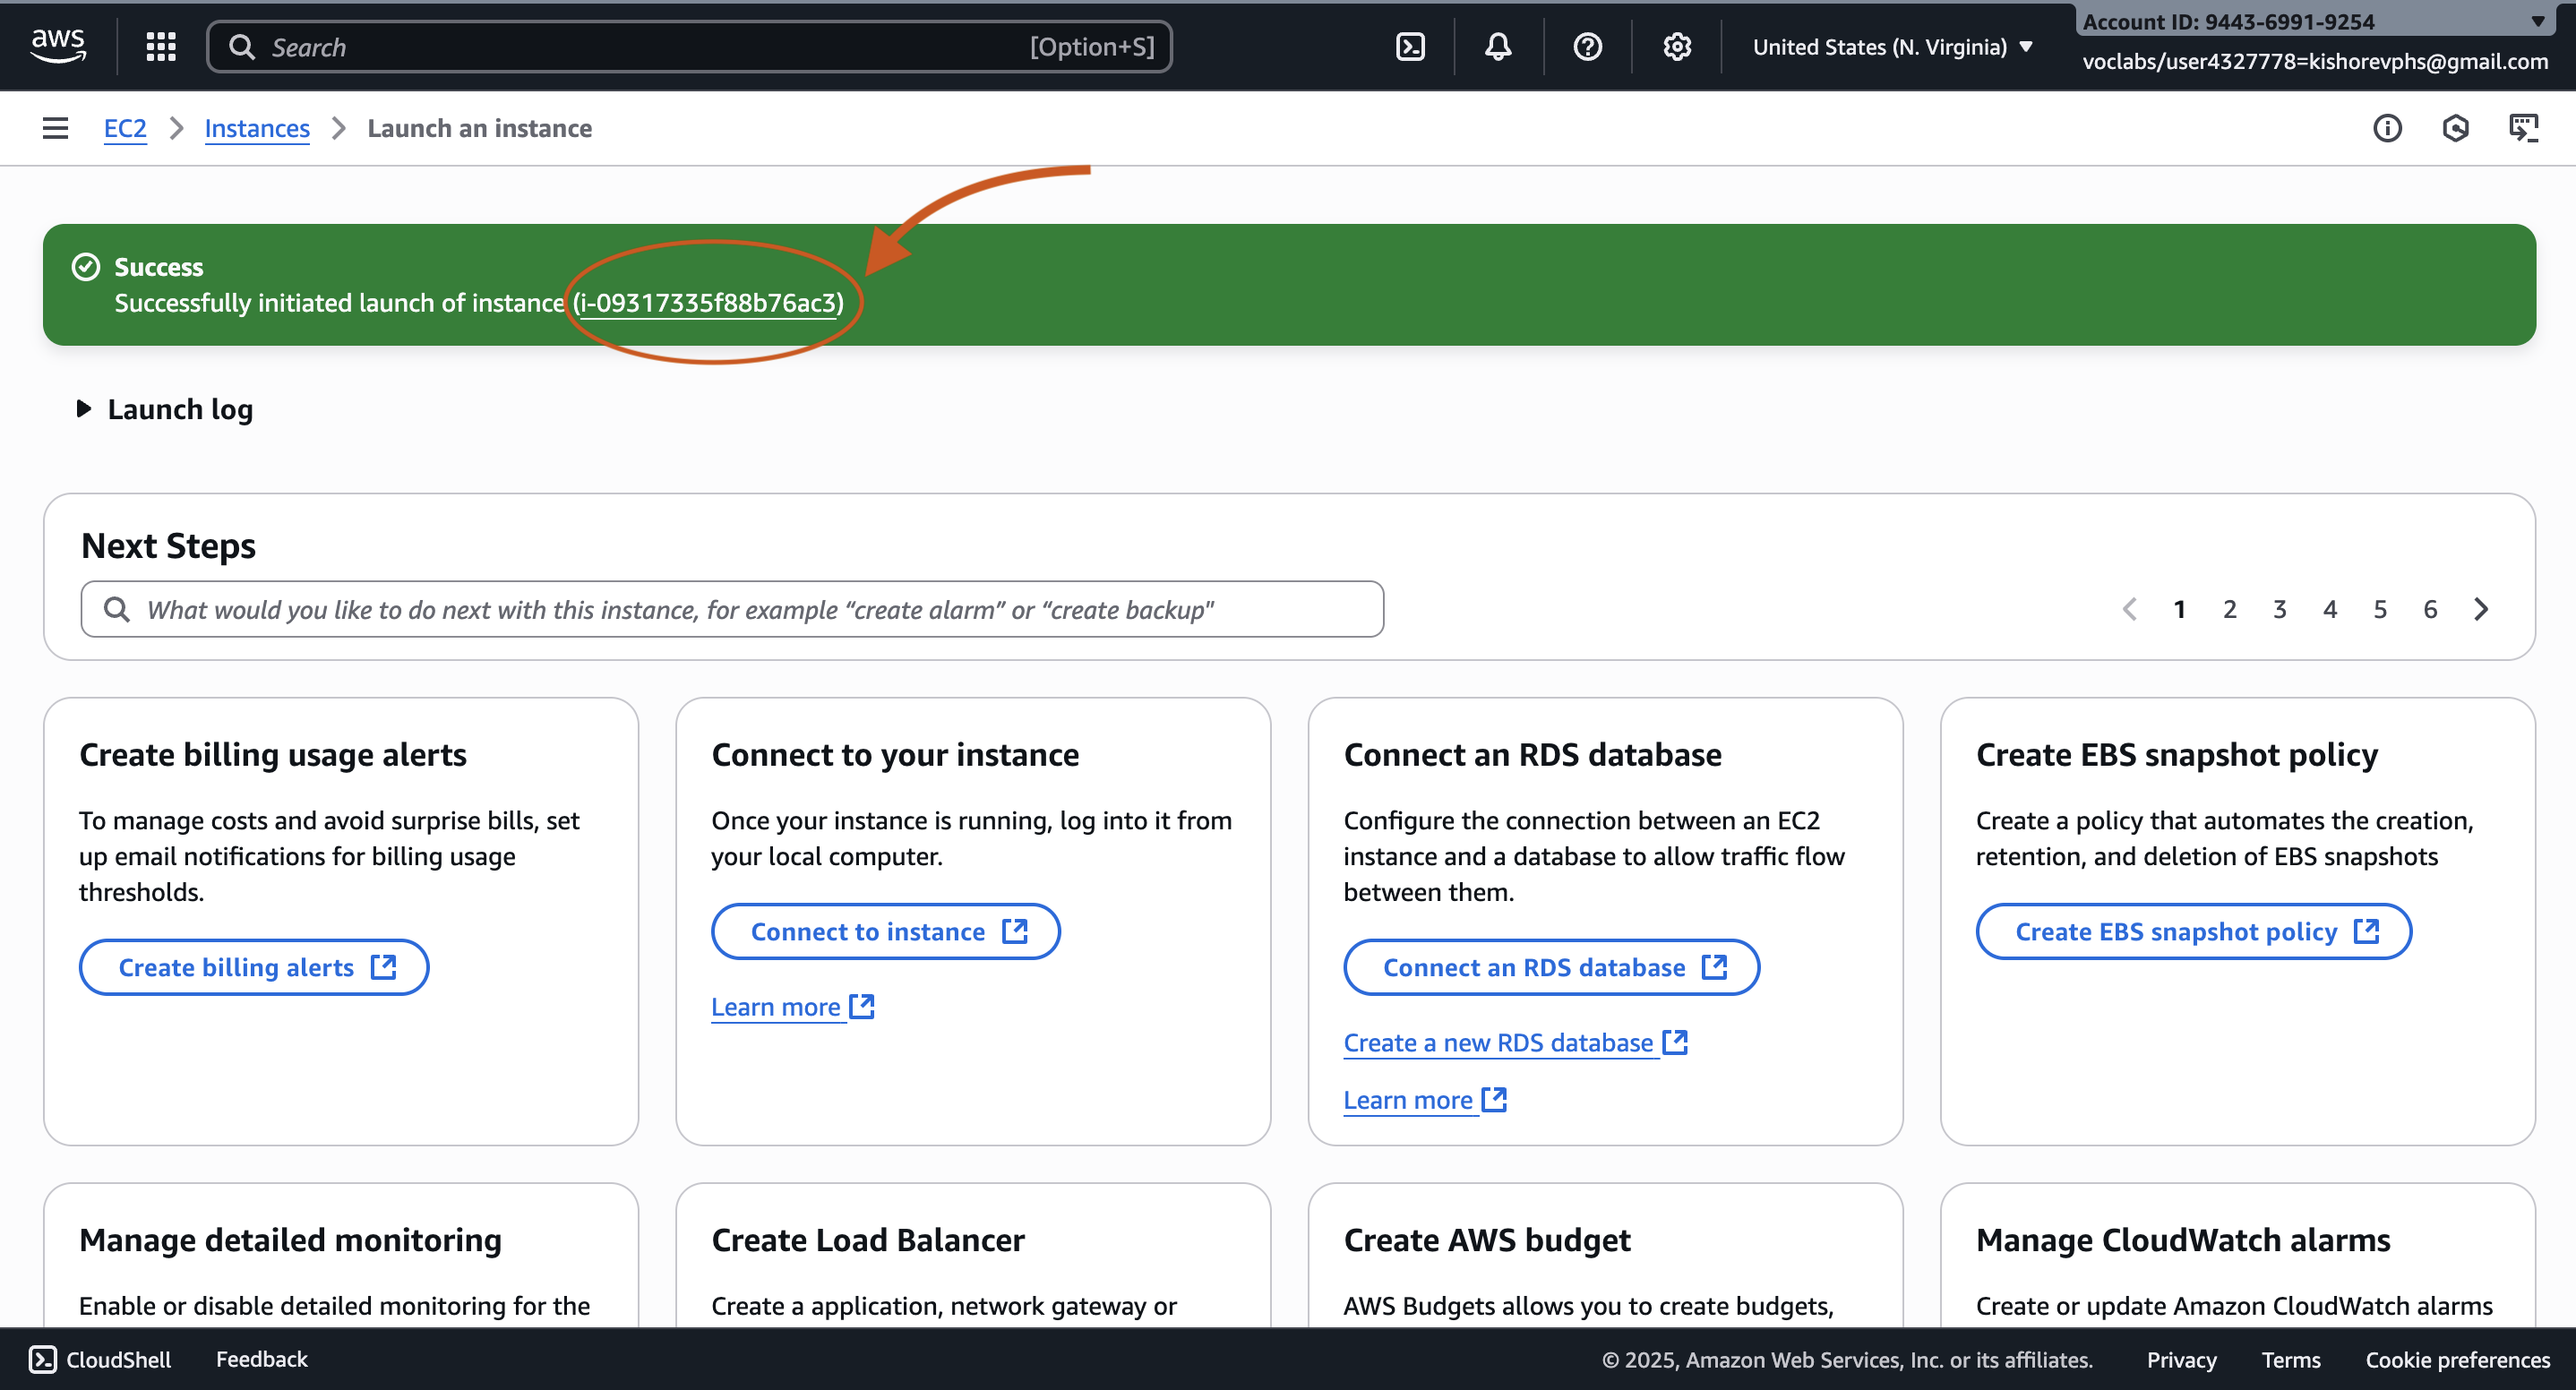
🎉 Congratulations — your instance is live!
Next, we’ll install Docker and NGINX inside Docker.
3. Connect to the Instance
You can connect using EC2 Instance Connect or SSH.

Copy the SSH Command
You’ll see a connection command like this:
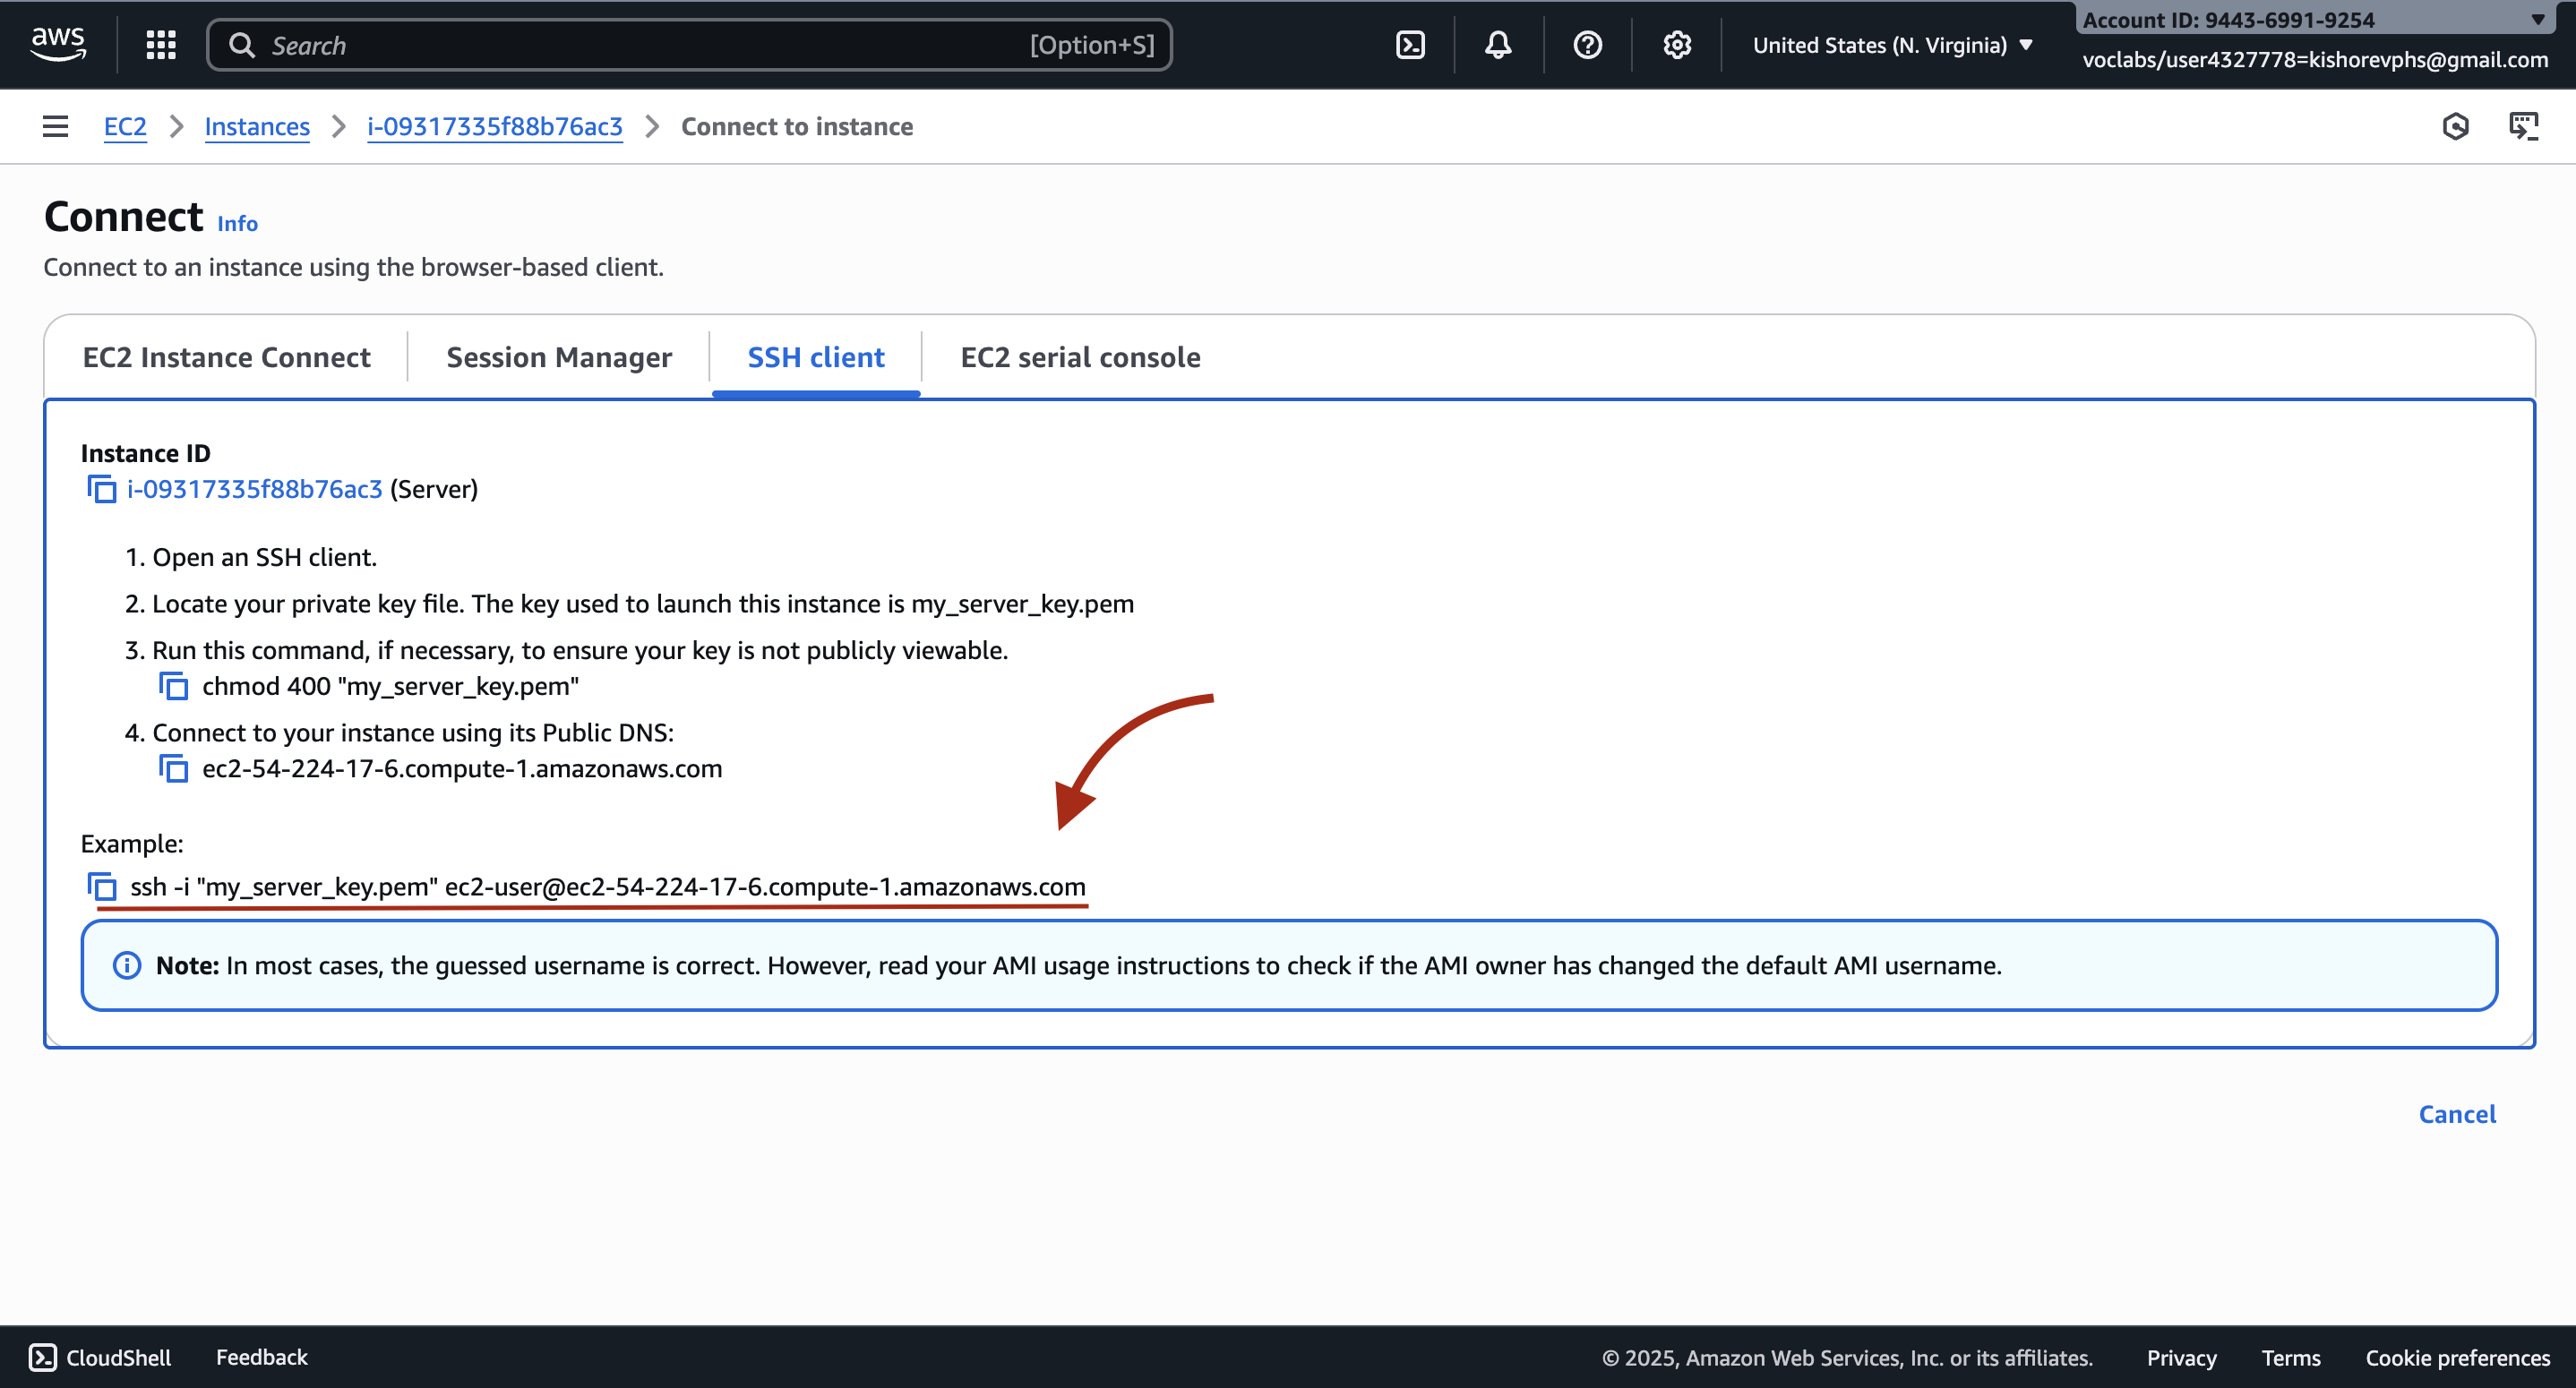
cd Downloads
ssh -i "my_server_key.pem" ec2-user@ec2-54-224-17-6.compute-1.amazonaws.com
For mac
macOS will not allow to change files in Download/
so move your downloaded file to Desktop or any folder of your wish
cd Desktop
chmod 400 "my_server_key.pem"
ssh -i "my_server_key.pem" ec2-user@ec2-54-224-17-6.compute-1.amazonaws.com
copy your ssh command and paste.
Note: Generally the downloaded file of key pair will be in Downloads , You should be in that folder and run the above ssh command.
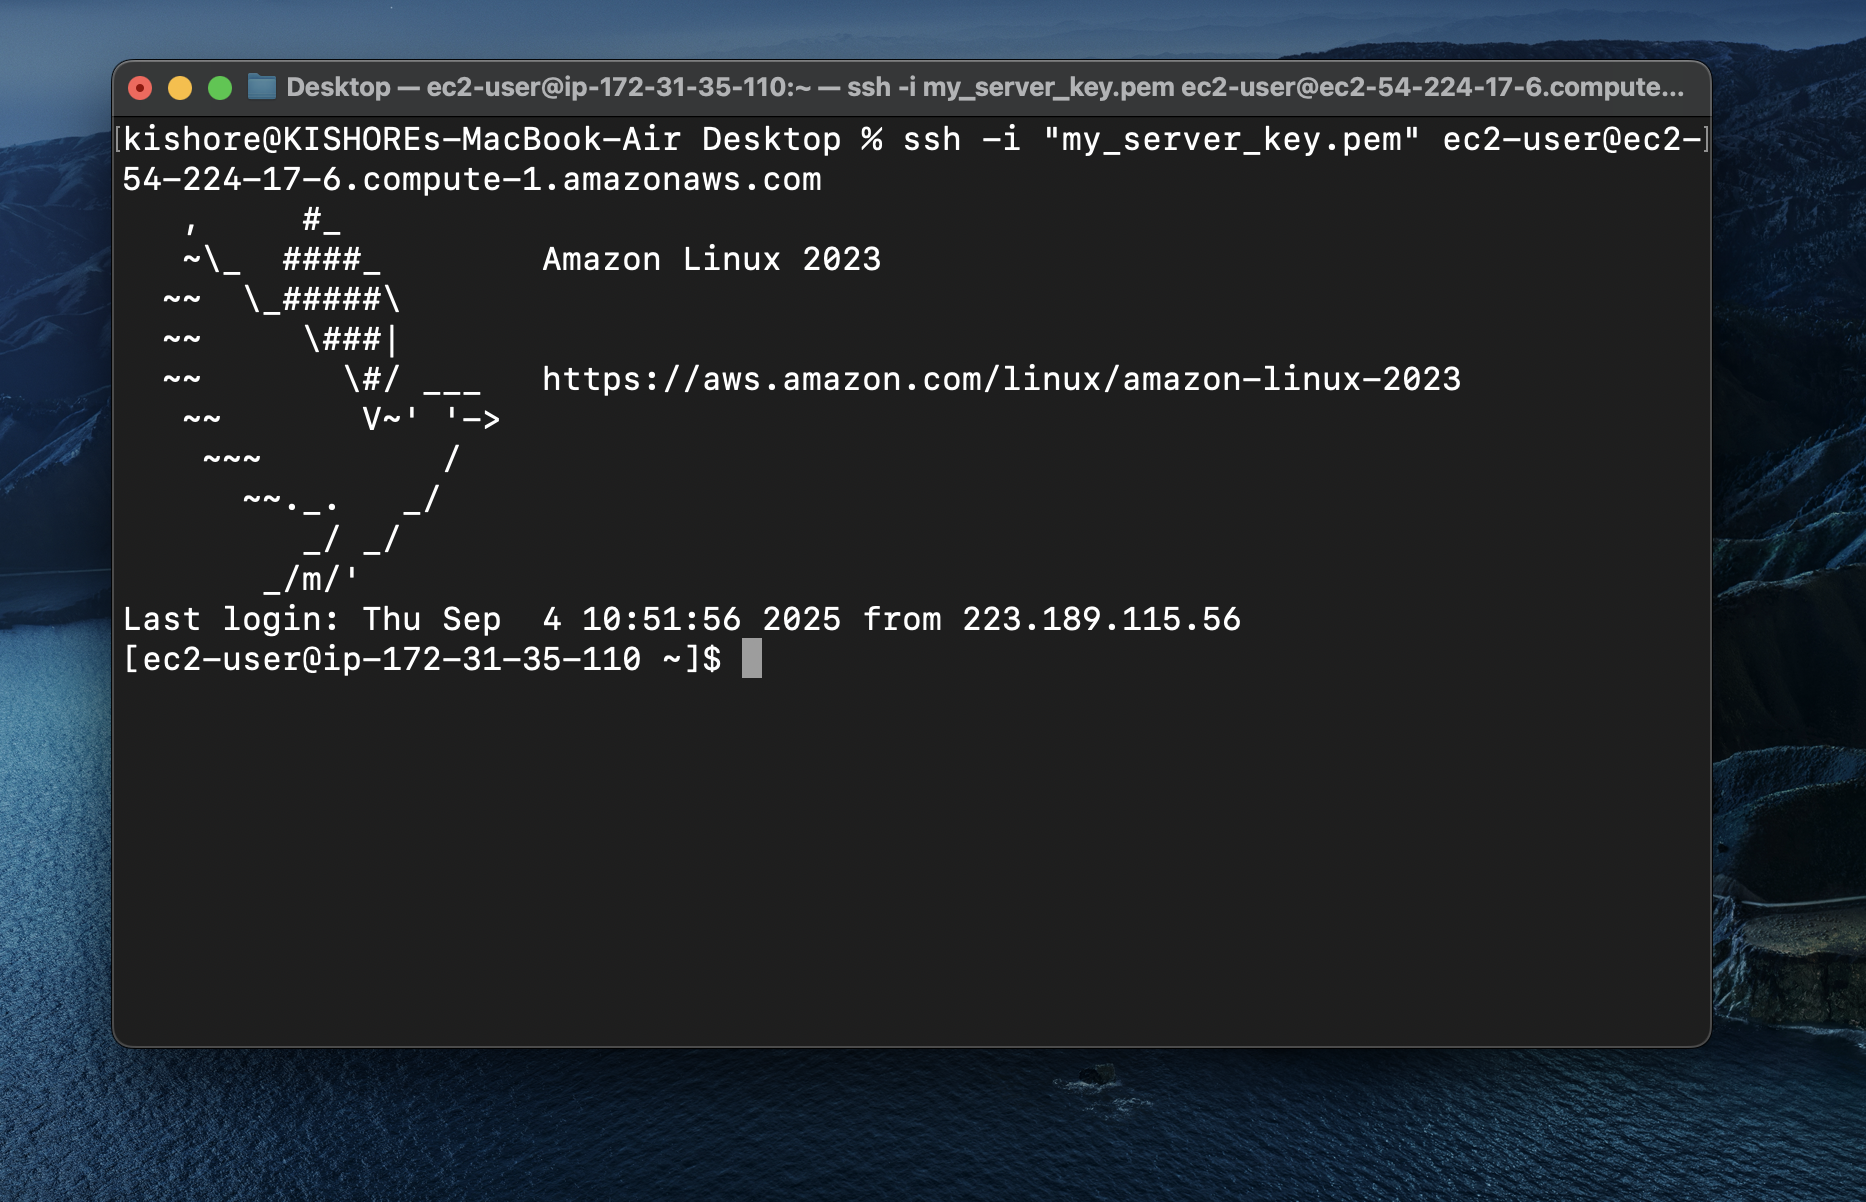
you should get this in your terminal/cmd
🎉 Then successfully you will be connected to your instance.
4. Install Docker
use yum for Amazon Linux
use apt for Ubuntu
Here I will be using yum , because I`m using Amazon Linux. Replace with apt in Ubuntu OS.
sudo yum install docker -y

#check for docker version,if it installed,it will come
docker -v
To start docker
sudo service docker start

#now if you run below command, you should see table headings of CONTAINER ID   IMAGE     COMMAND   CREATED   STATUS    PORTS     NAMES

sudo docker ps
To convert sudo docker to only docker (optional)
sudo usermod -a -G docker ec2-user

#Then you need to reboot machine to work with only docker.
now you can run docker ps only , no need of sudo or continue with sudo
5. Install NGINX Using Docker
To pull NGINX image
sudo docker pull nginx

#or docker pull nginx , if you ruined above command
To run NGINX in -d (detach) mode
sudo docker run -d --name nginx -p 80:80 nginx
-d is detach mode (after running command to come out of it)
-p is to expose port
here , 80 port is exposed to 80 port of your localhost.
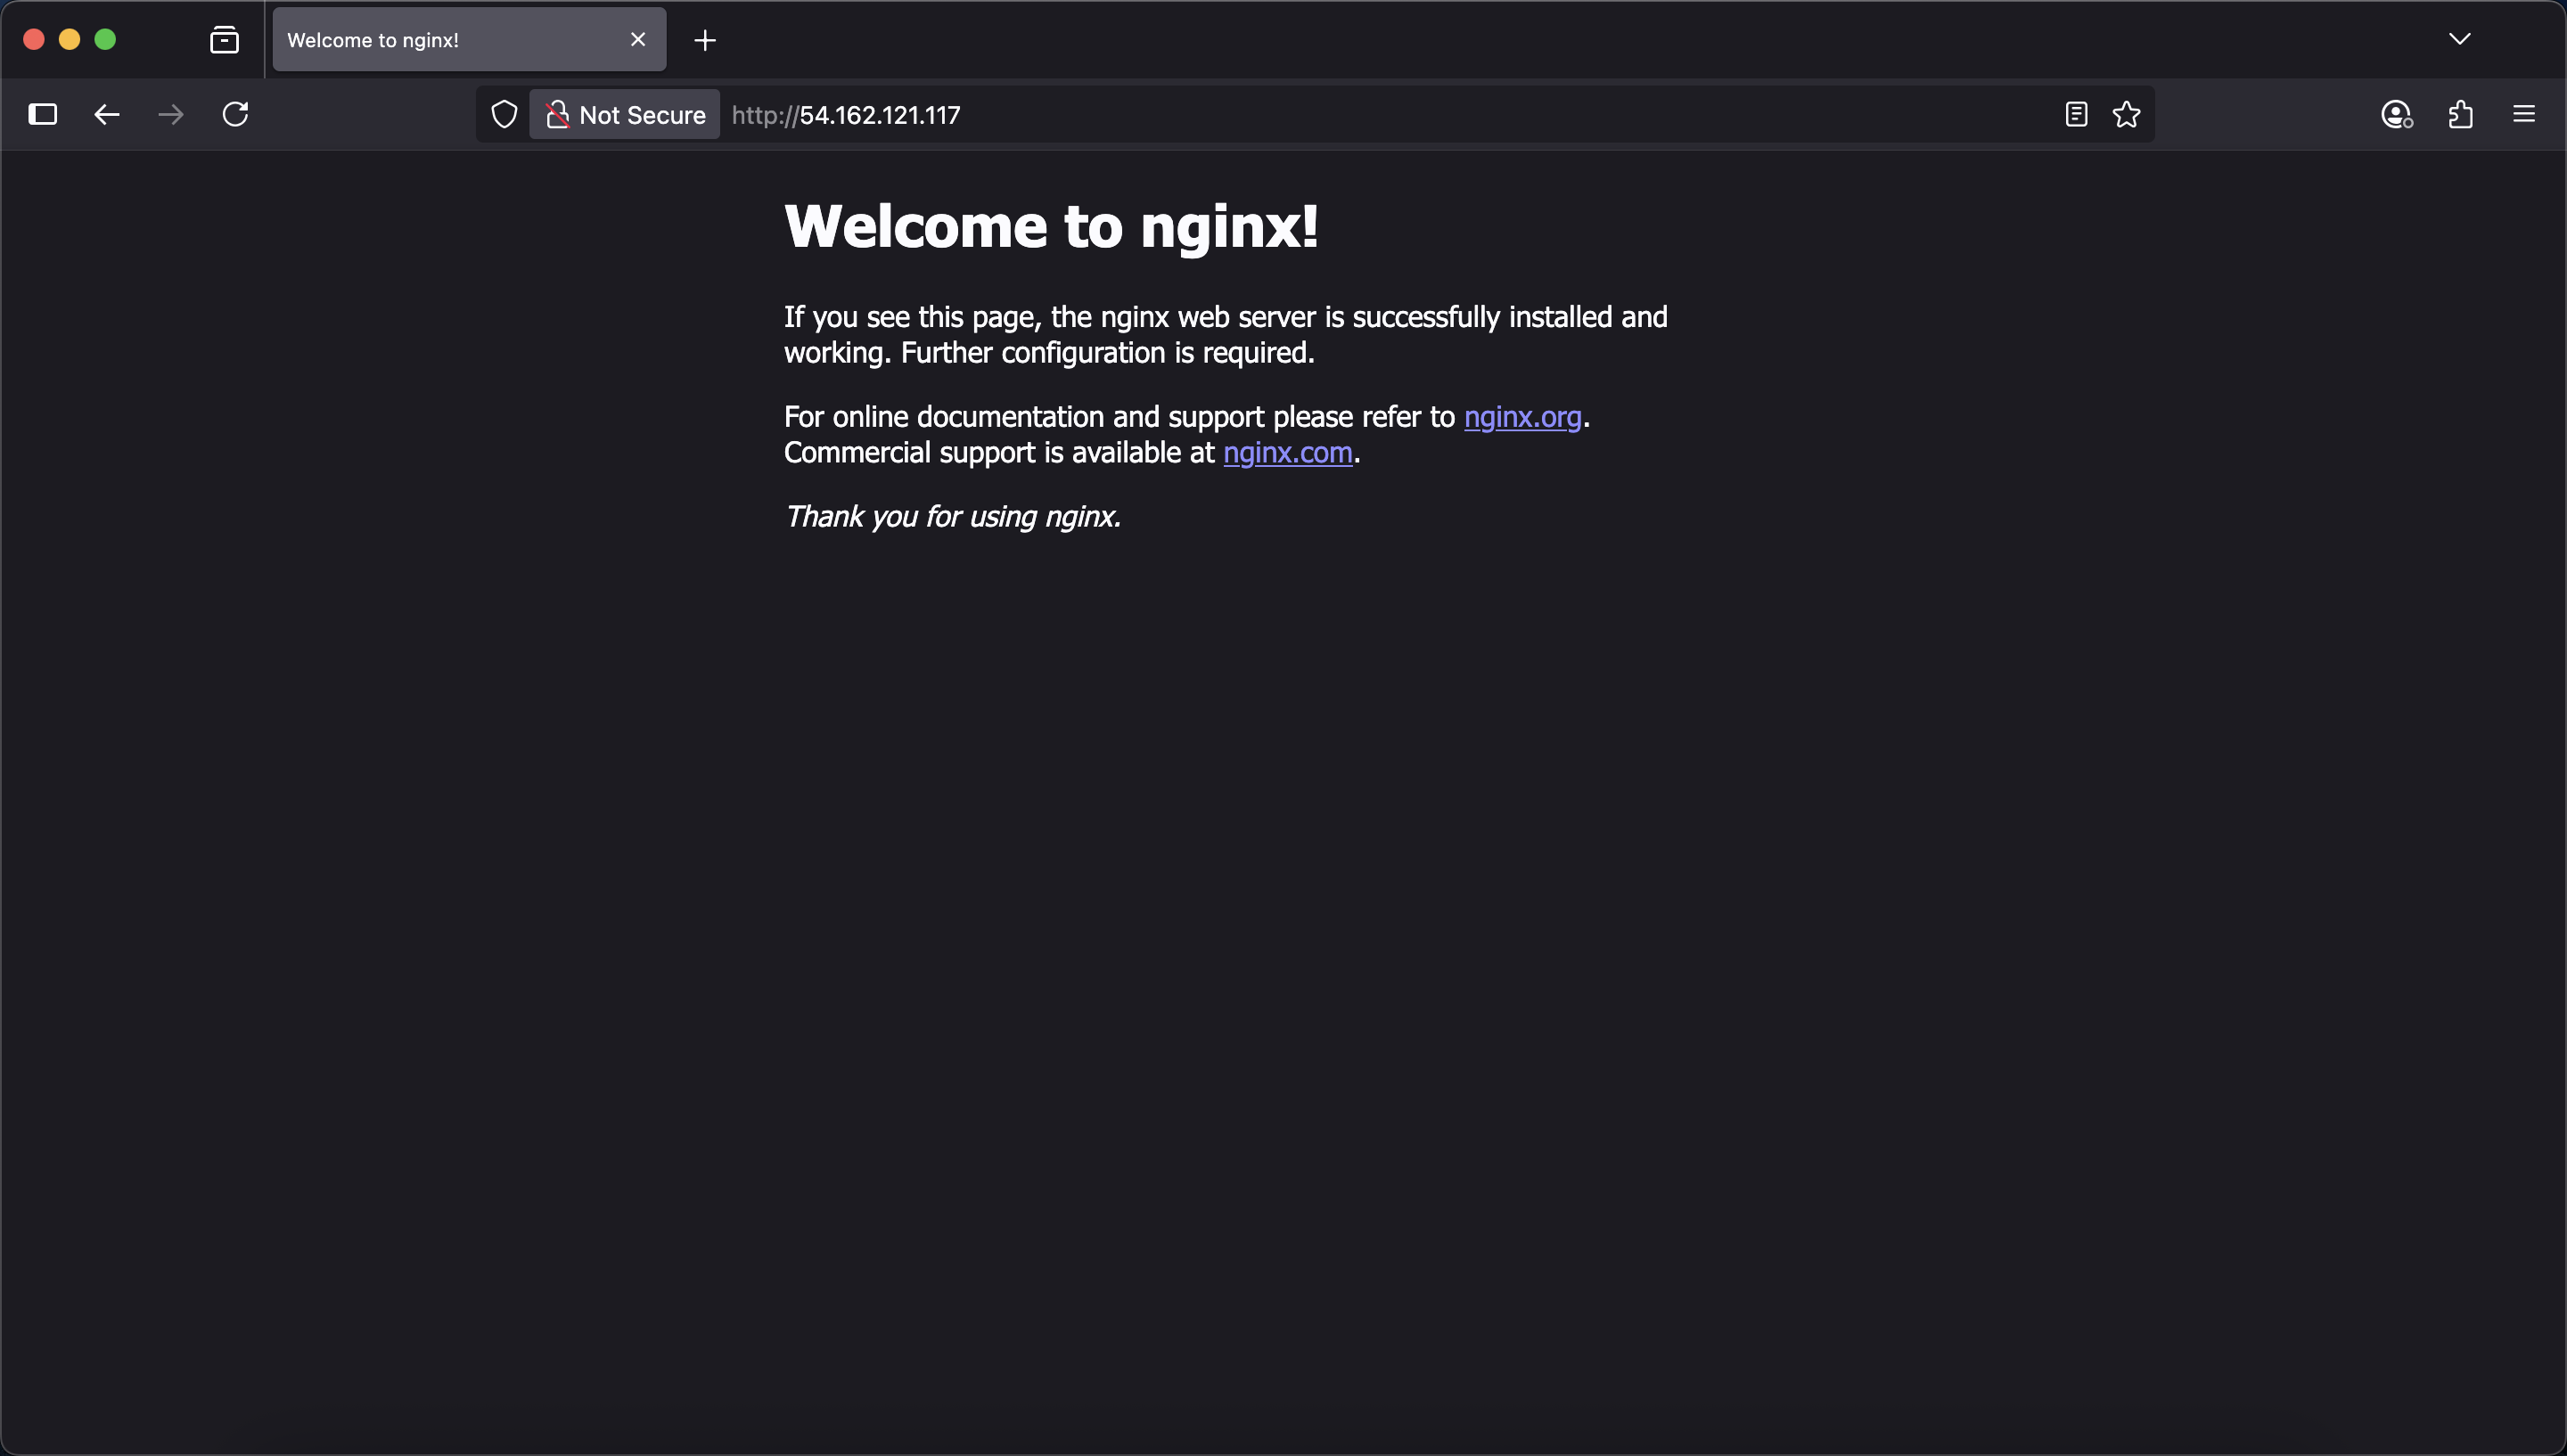
🎉 That`s it you successfully ruined NGINX.
To check
Open your local machine browser and enter your ec2 instanc ip address.
Note:You should enable Allow HTTPS traffic from the internet and Allow HTTP traffic from the internet in your EC2 Network settings or else you cann`t access nginx page in browser.
You should see
To Run a Sample Static Html page
1.Create a folder and inside it create a index.html file
mkdir my_website

cd my_website
2.Add your html inside index.html
You can use nano/vim/vi to edit your index.html
#To open nano editor
nano index.html
#same for vim or vi
#vim index.html
This is sample code for index.html
You can write your code init
<!DOCTYPE html>
<html>
  <head>
    <title>My Web Site</title>
  </head>
  <body>
    <h1>Hello from Nginx + Docker on AWS EC2</h1>
  </body>
</html>
3.Docker command to run
sudo docker run -d --name nginx -p 80:80 -v ~/my_website:/usr/share/nginx/html:ro nginx
-
-v ~/my_website:/usr/share/nginx/html:ro nginx→ mounts your folder into Nginx’s default web root (/usr/share/nginx/html). -
:ro→ read-only, so Nginx can’t change your files.
🎉 Now, you can enter your ip in browser and check your website